Time may not necessarily be money, but it still matters. Every second you spend wading through context menus or clunkily navigating Windows is a second you could be doing something you love instead. And with so much of modern life tied up in technology, those wasted seconds can add up fast.
Now it’s time to reclaim those lost seconds, minutes, and hours. These simple Windows 10 tips and tricks aren’t glamorous and most aren’t even new to the big May 2020 Update, to be honest, but when deployed together they can seriously streamline your workflow.
Once you’ve mastered these methods, be sure to check out our guides to 10 helpful Windows 10 tools you might not know about, how to tune Windows 10 for laser-focused productivity, and the best Windows 10 tips, tricks, and tweaks. Optimizing your setup gets awfully addictive, awfully fast.
Adjust your startup programs
Let’s start where it all begins: When your computer boots up. Seemingly every program you install worms its way into activating alongside your PC. Some software, such as your keyboard’s management app or your antivirus, deserves that lofty status. Others don’t. (I’m looking at you, game launchers.) And every program that leaps to life when Windows does delays your ability to use your system, especially if you haven’t upgraded to an SSD yet.
 Brad Chacos/IDG
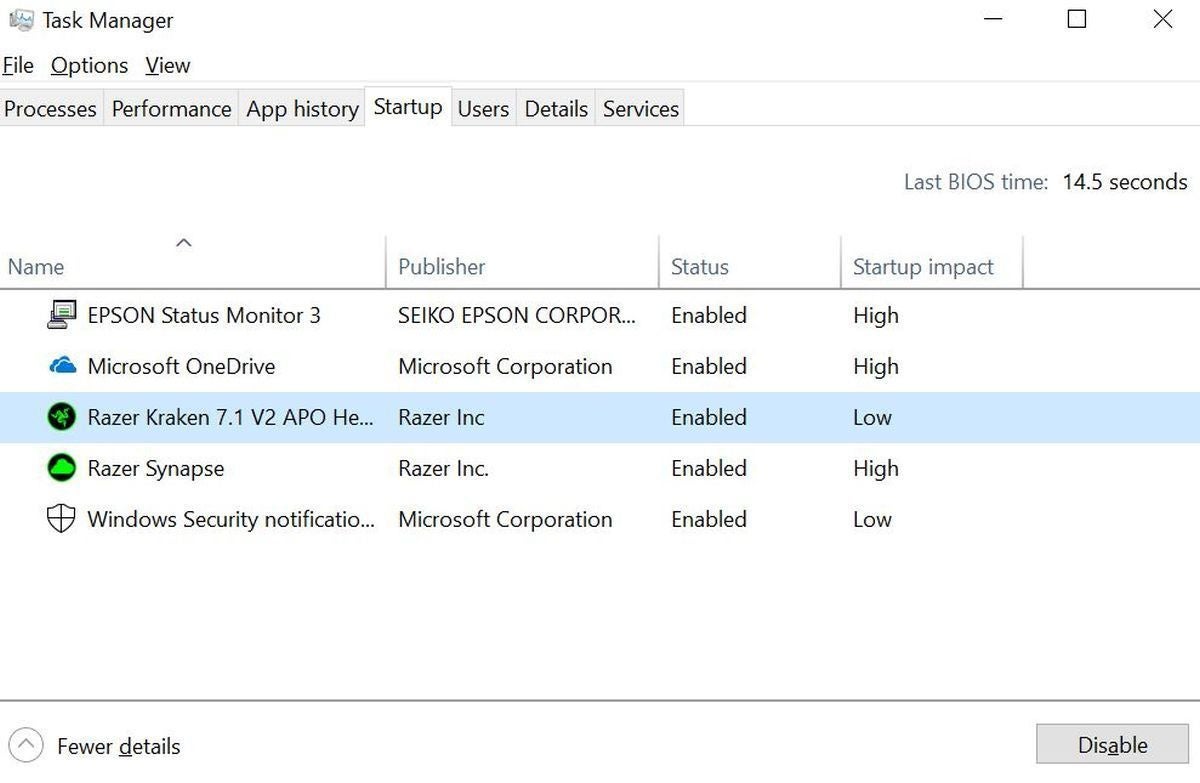
Fortunately, it’s easy to seize control over which programs launch with Windows. Simply press Ctrl + Shift + Esc or search for “Task Manager” to open the Windows 10 Task Manager, then click on the Startup tab at the top. There, you’ll see all the programs clamoring for a spot in the startup limelight, complete with an estimated impact rating from Low to High. If you want to turn any off, simply click its listing and select Disable. Obviously, doing so means you’ll need to open the program manually to activate it from now on.
Customize your task bar
Now let’s start organizing things a bit better. Launching a program that’s pinned to your Windows 10 taskbar is always faster than hunting it down in the Start menu or on your desktop. So you’ll want to populate yours with the software and files you use the most.
To pin a program to your taskbar, simply right-click it and select the Pin to taskbar option in the context menu that appears. You can also do this to a program’s icon when it appears in your taskbar after opening it. You can pin frequently visited webpages to your taskbar by saving it as a shortcut via your browser’s setting menu, then right-clicking that shortcut on your desktop and selecting Pin to taskbar.
Folders can only be pinned to the Start menu, alas. You can pin specific files to your taskbar, kinda-sorta, but the process is slightly different, and brings us to our next tip…
Embrace jump lists
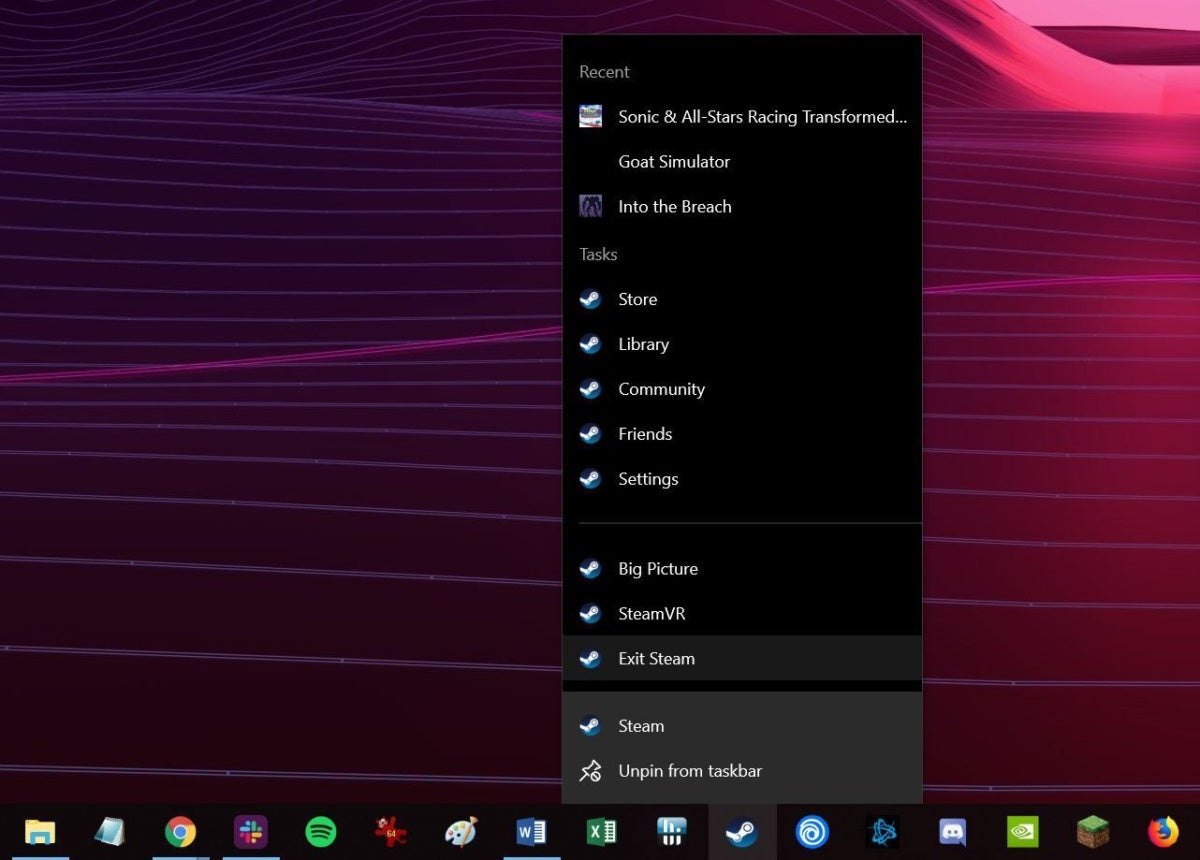
Now that you’ve pinned your most-used programs to the taskbar, you’re ready to take advantage of the awesomeness known as jump lists. When you right-click a program icon in your taskbar, most will reveal a pop-up list of your most recent open files for that program, or shortcuts to common tasks. It’s a great way to jump right back into a project without needing to slog through folder after subfolder in the Windows File Explorer.
 Brad Chacos/IDG
Better yet, if you know you’ll constantly return to a particular file or shortcut, you can pin it to the top of the jump list by mousing over its entry, then clicking the pin icon that appears all the way on the right. Any files you do it for will appear under a new “Pinned items” section at the top of the jump list. Simply click the pin icon for an entry again to remove it.
Launch taskbar shortcuts with keyboard shortcuts
But we’re looking for speed. Unless you’re summoning a jump list to leap back quickly into a specific file, even clicking those icons in your taskbar can be sped up—by not clicking on them. Power users swear by the speed of keyboard shortcuts, and you can open a program on your taskbar without having to lift your hand to your mouse.
You used to be able to open specific programs pinned to your taskbar by pressing the Windows key simultaneously with a number associated with where the program is located to the right of the Start Menu—pressing Win + 1 to open your first pinned option, Win + 2 to open the second option, and so on. That seems to have disappeared in Windows 10, though it still works in older versions of the operating system.
If you want to use your keyboard to open programs pinned to your taskbar in Windows 10, press Win + T. You’ll see a box appear around the first pinned item to the right of the Start Menu. Press Enter to open it, or keep pressing T to cycle through all your pinned programs from left to right.
Keyboard shortcuts!
 Adam Patrick Murray/IDG
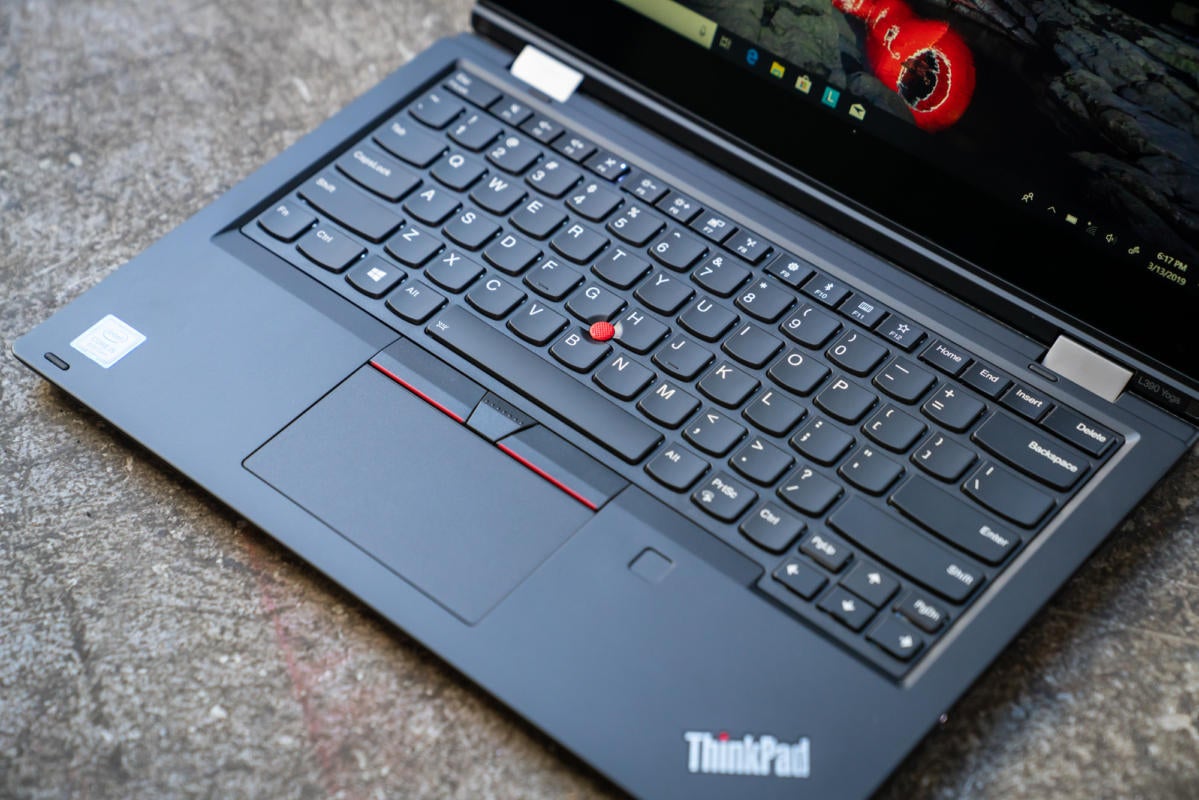
Continuing with that theme, keyboard shortcuts are wonderful for performing tasks much quicker than you can by clicking around menus with a mouse. If you’re a keyboard shortcut novice, here’s a sampling of some of the more useful ones:
- Crtl + C: Copy
- Ctrl + X: Cut
- Crtl + V: Paste
- Crtl + Z: Undo last action (these Crtl tips work with most software)
- Alt + Tab: Cycle through open programs
- Win + Tab: See all open program on a per-monitor basis, summon Windows Timeline
- Windows key: Open search
- Windows + E: Open File Explorer
- Windows + Print Screen: Takes a screenshot and saves it to your Pictures folder
- Windows + I: Open Windows Settings
- Crtl + Shift + Esc: Open Task Manager
- F5: Refresh the active window
If you want to see a full list of all Windows 10 keyboard shortcuts, check out this cheat sheet on Microsoft’s support site. Most—but not all—of them should work with older versions of Windows, too.
DIY keyboard shortcuts
You don’t have to stop with Windows 10’s native keyboard shortcuts. You can create custom keyboard shortcuts to open programs quickly, too.
 Brad Chacos/IDG
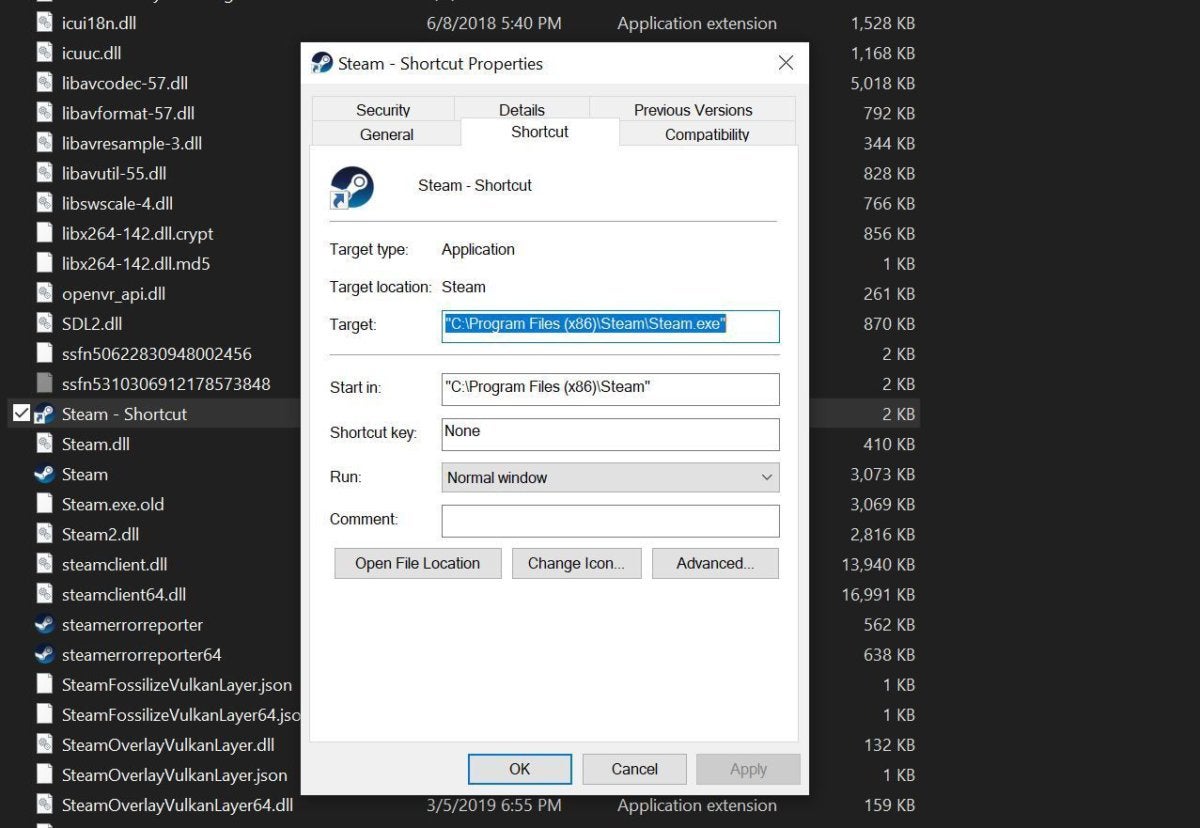
To do so, right-click the app and select Create shortcut. You’ll see a new icon appear with the same name as the program, but with “shortcut” at the end. Right-click the shortcut for the program and select Properties. In the pop-up menu that appears, select the Shortcut tab, click the Shortcut Key field, and press the alphanumerical key you’d like to associate with the program. Click OK to save the change. Windows will assign Crtl + Alt + <key of your choice> as the keyboard shortcut to open that program.
This trick can be seriously useful for wrangling programs that you use often, but not often enough to pin to your taskbar. I like using it for the myriad game launchers installed on my PC, associating the keyboard shortcut’s letter with the first letter of the game launcher’s name.
Shut it all down
If you’re opening programs and files willy-nilly, you may find yourself drowning in open windows. Fear not: Windows provides several ways to clear the deck near-instantly, returning your focus to the task at hand.
My favorite? Click and hold the title bar at the top of the program you’re working in, then give it a vigorous shake. All other windows will be minimized to the taskbar. Pressing Windows + Home accomplishes the same thing. Alternatively, if you want to minimize everything and reveal your desktop, simply press Windows + D on your keyboard, or click the barely-visible sliver all the way to the very right of your taskbar, beyond the system tray and notification center. Poof.
Supercharge the Send To menu
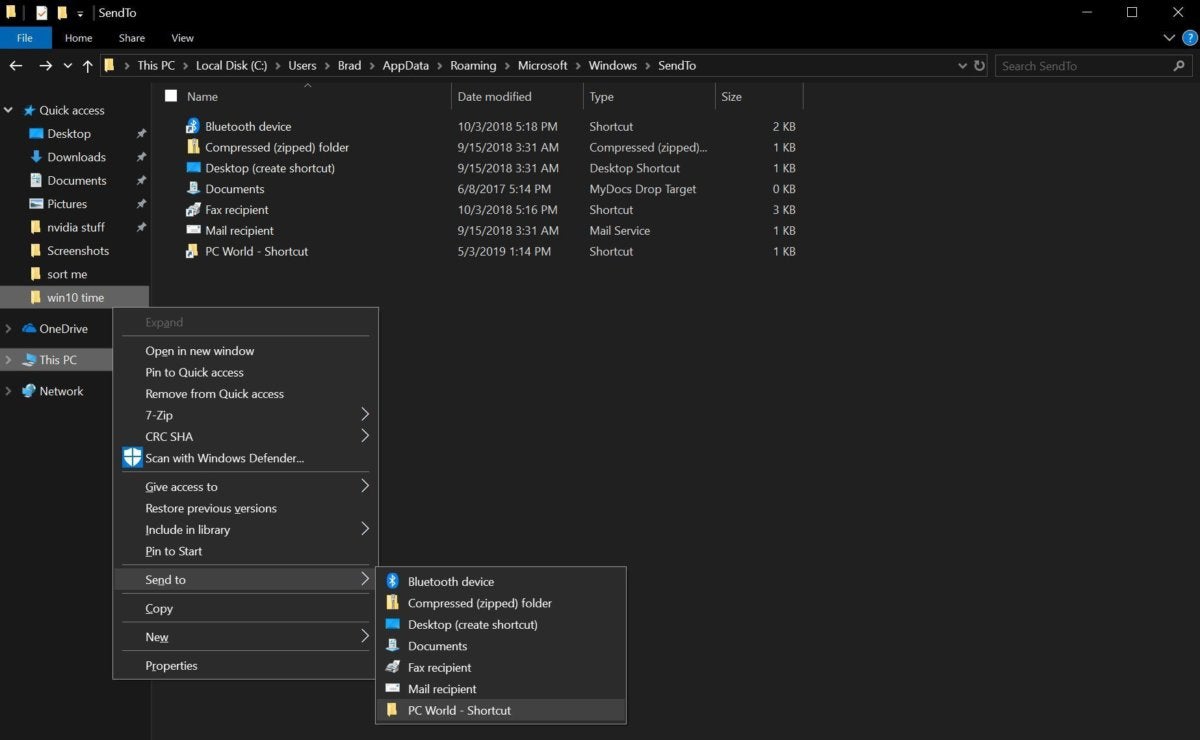
Staying organized is key to working efficiently. You can use the right-click context menu’s Send To option to keep your virtual house clean, though doing so will require altering the menu to fit your particular needs. Doing so is fast, and well worth the trouble.
 Brad Chacos/IDG
Start by creating shortcuts to your most-used folders. (I like creating a shortcut for my PCWorld work folder, for instance.) Once that’s done, open File Explorer and type shell:sendto into the location bar at the top. File Explorer will reveal a list of the options that appear in the Send To menu. Simply drag your previously created shortcuts into this folder. Next time you right-click an item and summon the Send To menu, those folders will be listed as options. Happy sorting!
Quick Access or This PC?
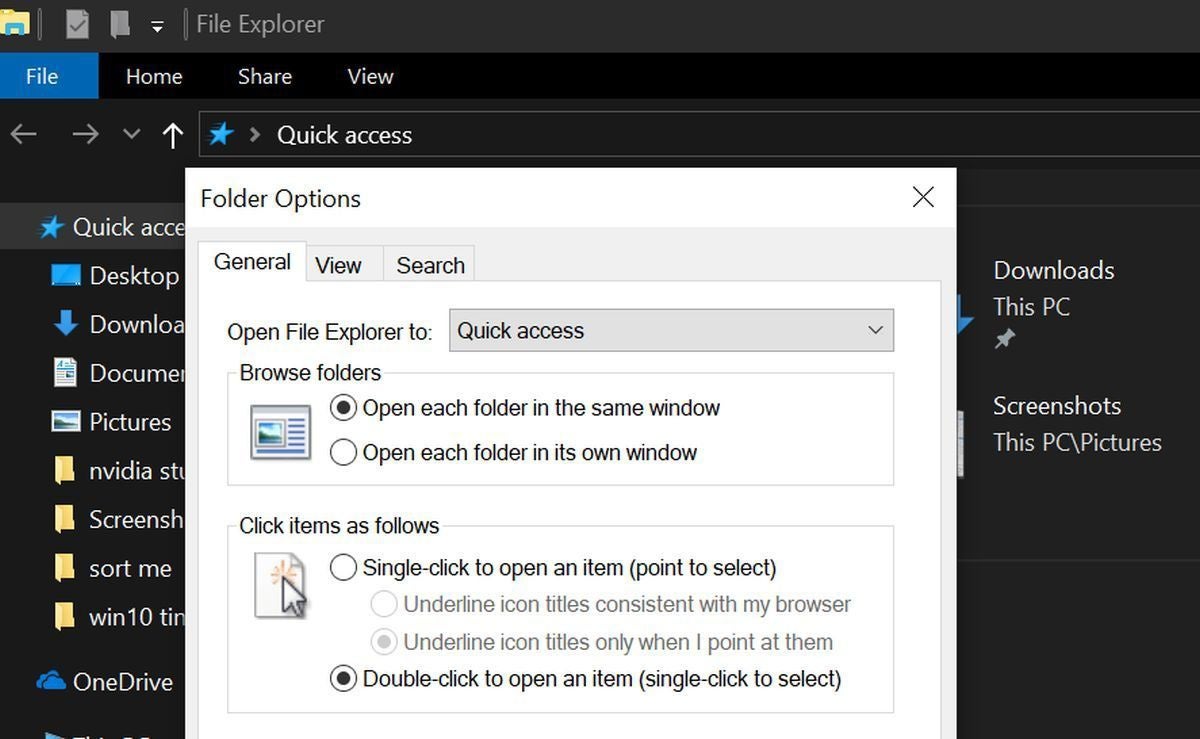
While you’re in File Explorer, you might want to change the location it opens to. Windows 10 changed things up by having File Explorer default to Quick Access, a view of your most recently used files and frequently used folders. Sounds handy, right? Not so much if you’re already taking advantage of jump lists in your taskbar. If you’ve set up your system as outlined in this guide, you’re much more likely to wade into File Explorer to hunt down infrequently used items—the opposite of what Quick Access provides.
 Brad Chacos/IDG
Fortunately, you can change how File Explorer behaves and have it open to the “This PC” interface instead, where you can start drilling down into the subfolders on your hard drives. To do so, open File Explorer, click on the View tab, and then click Options. A single option, Change folders and search options, will appear; select it. In the pop-up it summons, open the General tab, click the “Open File Explorer to” drop-down at the top, and select either Quick Access or This PC.
Power up
Finally, once you’ve mastered these simple yet secret tricks, you could find even more time savings by delving into the exotic world of Windows power tools. Secretive enthusiast-class tools like Timeline, Nearby Sharing, Cloud Clipboard, Storage Sense, and God Mode can help you streamline your workflow even more. Head over to our guide to 10 truly helpful Windows 10 tools you might not know about to fall even deeper down this rabbit hole, or our tutorial on how to fine-tune Windows 10 for laser-focused productivity if you want to minimize interruptions.

