If your iPhone can run iOS 14 or later, you can set up the Sound Recognition feature, which alerts you to critical sounds — like a smoke alarm, doorbell, or crying baby. Even if you didn’t hear the noise, you can still keep track of what’s going on around you. Sound Recognition is an accessibility feature designed for people with hearing impairments, but it’s also quite useful for those in noisy environments or on video chats where critical sounds can blend into the background or go unnoticed.
When you enable Sound Recognition in the Accessibility settings, you’re letting your iPhone or iPad listen in on your surroundings with the microphone, catching specific sounds you choose and then sending you an on-screen notification. Sound recognition operates via onboard intelligence, so no network connection is needed.
Sound recognition can also be added to Control Center shortcuts and easily turned on and off in the iPhone Control Center after swiping down from the top right of the screen.
Sound Recognition is a service and a convenience, but Apple warns that you should not solely rely on it in risky or emergency situations.
Set up Sound Recognition
You can have Sound Recognition listen for as many or as few sounds from Apple’s pre-programmed list as you want, and if you ever turn off the Sound Recognition feature, it will remember what sounds you previously chose, so you don’t have to select them again. Here’s how to set it up.
Step 1: From Settings tap Accessibility.
Step 2: Tap Sound recognition.

Step 3: Toggle on the Sound recognition switch. When the switch is green, the feature is enabled.
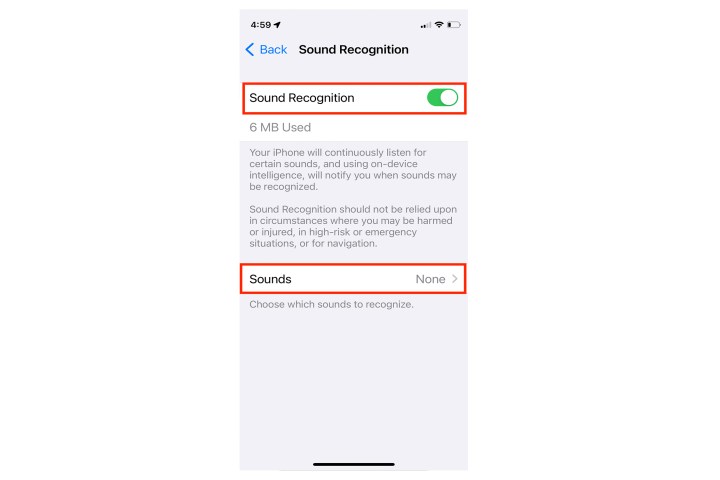
Step 4: Choose from the list of sounds or enable all of them.

Step 5: An alert appears warning that Hey Siri will not be available while the Sound Recognition feature is switched on.

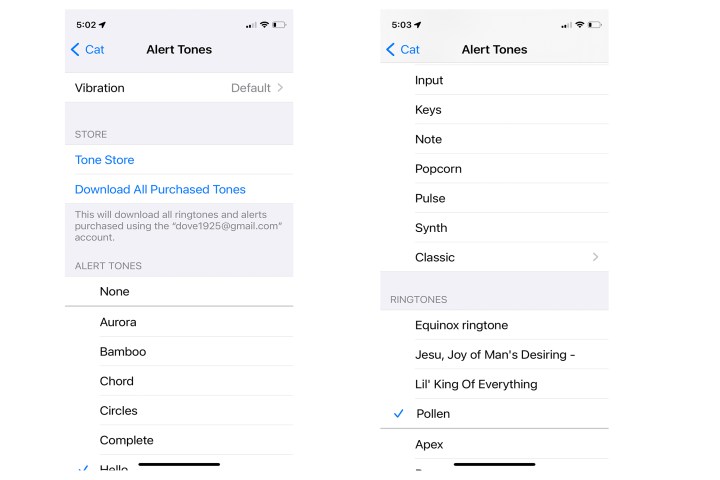
Step 6: Choose the tone or vibrations you prefer to accompany your Sound Recognition notification.
Launch Sound Recognition from the Control Center
You can quickly enable or disable Sound Recognition via the Control Center by adding the shortcut to your Control Center screen.
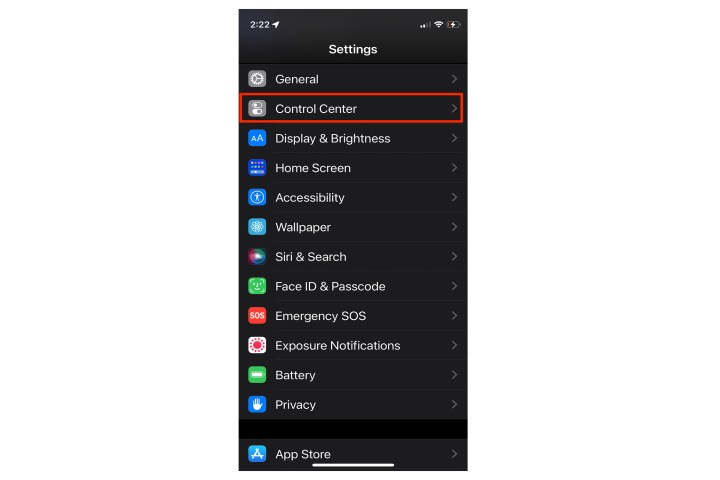
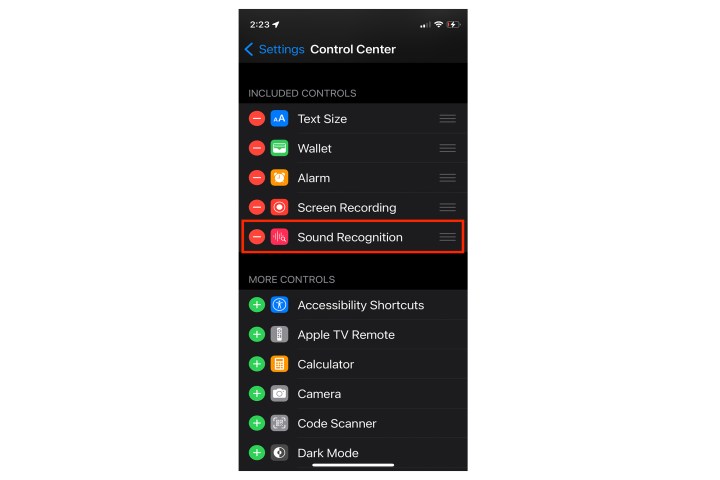
Step 1: From Settings, go to Control center.
Step 2: Scroll down to the More controls section and tap the green Plus sign next to the Sound recognition control.
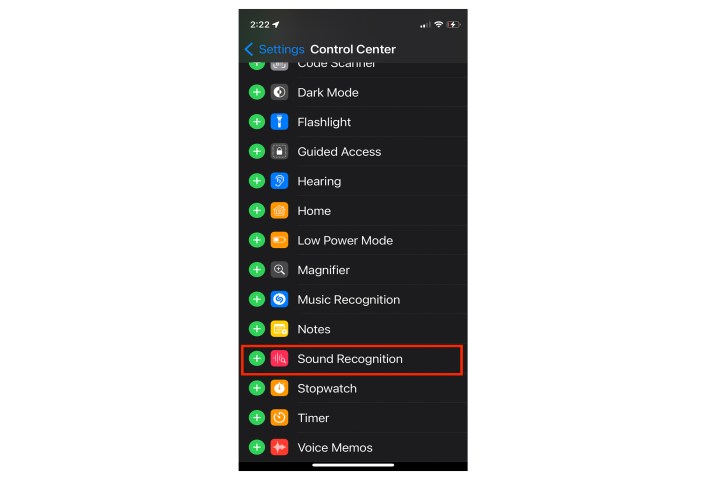
Step 3: Sound Recognition will now be listed in the Controls section at the top of the Control Center settings page.
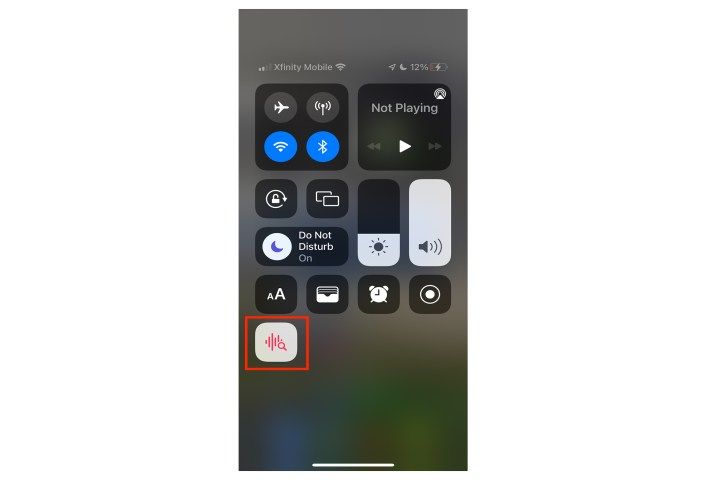
Step 4: Tap the Icon to access the feature directly from the Control Center.
Set up Sound Recognition notifications
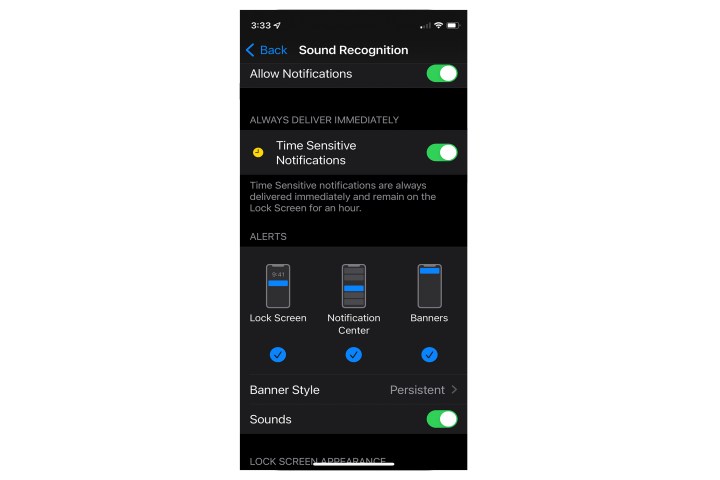
You must have Notifications enabled and the specific Sound Recognition notification control turned on for the feature to work. Even if you have your mute button on, you will still see or hear your phone vibrate.
Step 1: From Settings go to Notifications.

Step 2: Tap Sound recognition.

Step 3: Toggle on Notifications and check your delivery and alerts preferences.
While Sound Recognition is already a cool feature in iOS 14 and iOS 15, get ready for more improvements in the upcoming iOS 16. The new iOS will let you create and record original sounds rather than relying on the iPhone’s programmed sound options. You will be able to set your own sound alerts for items like medical devices, your home’s doorbell, or electronic sounds specific to your appliances. This customization greatly expands the sensitivity, personalization, and utility of the Sound Recognition feature.
Editors’ Recommendations

