Oddly enough, one of the best ways to back up your data to an external hard drive comes from a cloud storage company.
I’m referring to iDrive, which offers a free local backup utility inside of its Windows and Mac apps. While iDrive is better-known for offering cheap cloud storage, its local backup tool doesn’t require a subscription and is only limited by the amount of space on your storage drives.
Although I personally still prefer Microsoft OneDrive as my cloud storage service—mainly because of its tighter Windows integration and bundling with Microsoft 365—iDrive’s local backup tool is a straightforward and effective way to make copies of your important data onto storage drives that you control.
Here’s how to use it:
Setting up iDrive
iDrive requires an account to use its Windows and Mac apps, but you can just use iDrive’s free tier (with 10 GB of cloud storage) to access the local backup tools. Create your free account first, then use it to log in after installing the iDrive desktop app.
When you first launch the iDrive app, you’ll be looking at the “Backup” tab, and the default option will be “Backup files to my iDrive account.” If any of your folders are listed in this section, right click and select “Remove all items” so that iDrive doesn’t attempt to store your files in the cloud.
Next, click the button for “Backup files to Local, Wi-Fi, or Express devices.” Directly beneath this button, click the “…” next to “Backup location,” then choose your external drive from the list. (If you don’t have an external drive already, PCWorld has some recommendations.)
Jared Newman / Foundry
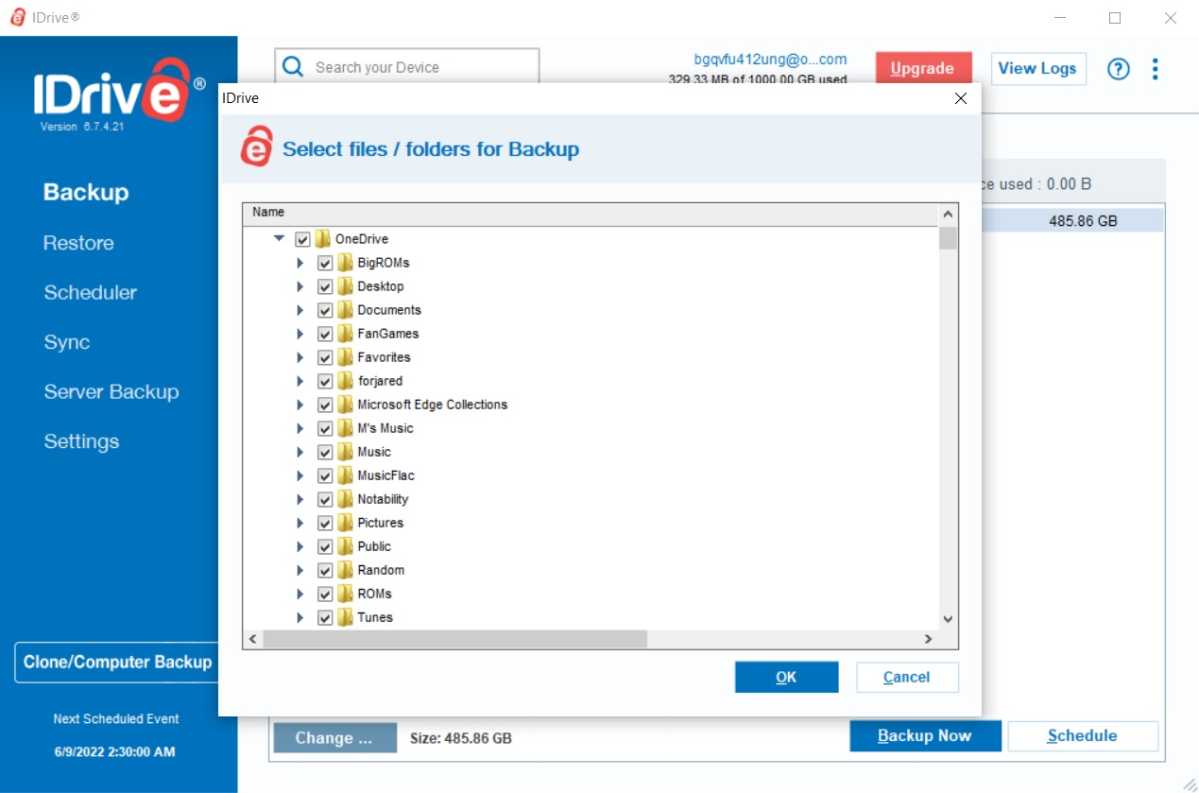
Now, it’s time to choose which computer folders you’d like to back up. Near the bottom of the iDrive app, click “Change,” then check off all the storage drives or folders you want to include. They should now appear under “Files / folders for local backup.”
Jared Newman / Foundry
Once everything’s ready, click “Backup Now” to make your first backup. This can take minutes, hours, or even days depending on how much data you’re storing and the speed of your external drive, so be patient.
Scheduling routine backups
Backing up your data only works if you do it on a regular basis. To that end, iDrive also offers a scheduler for making routine backups automatically.
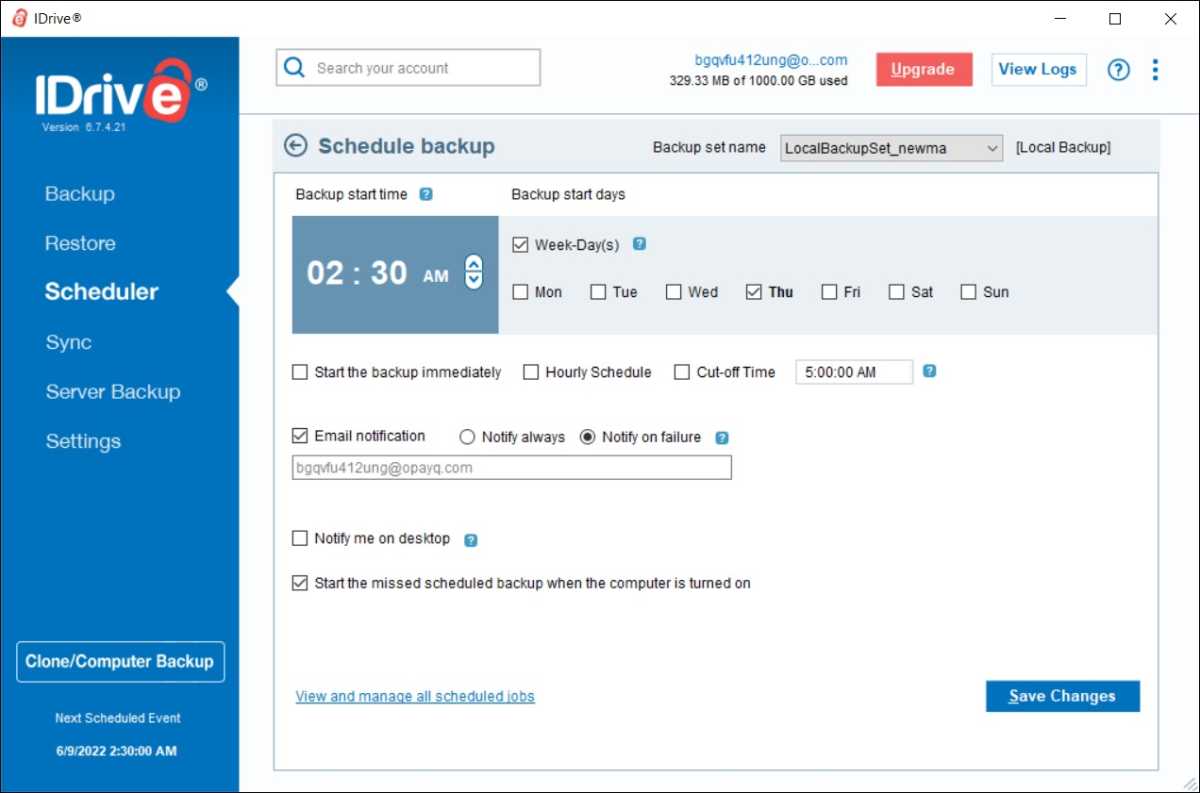
From the Backup tab, click “Schedule,” then check off the days of the week on which you’d like to run the backup, along with the time of day to start. With an always-on desktop PC, you’ll most likely want to schedule the backup for the middle of the night. Otherwise, set it for a time when your computer is likely to be up and running.
Jared Newman / Foundry
You can also set up email notifications to confirm that the backup succeeded (or failed), or get notifications through the desktop app. If your computer’s off during the scheduled backup time, iDrive will resume it by default once the computer back on, but you can disable this if you wish. Click “Save Changes” to begin the schedule.
If you’re not using iDrive’s online backup service, you should also disable scheduled online backups from this menu. Select “Default BackupSet” from the dropdown list at the top, then uncheck the daily scheduling settings.
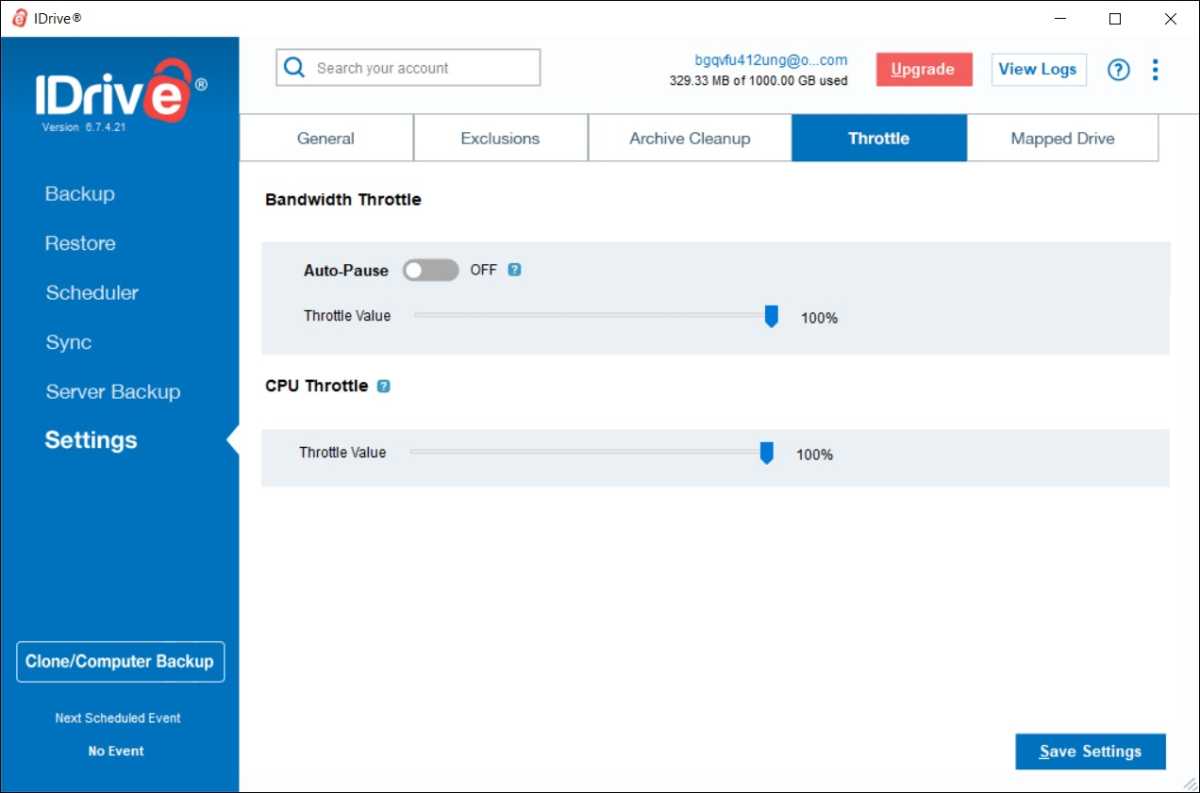
One last useful option to note: Under Settings, you can click the “Throttle” tab and set a limit on CPU use for your backups. That may be helpful if you have a lightweight PC and the backup operation is hindering your work.
Jared Newman / Foundry
Restoring your data
Note that iDrive doesn’t simply mirror your files onto an external drive. Instead, it creates an encrypted copy of your data, so if you navigate to the backup location in File Explorer, you won’t find anything usable. To restore your files to their original, unencrypted form, you’ll need to use the iDrive app’s Restore function.
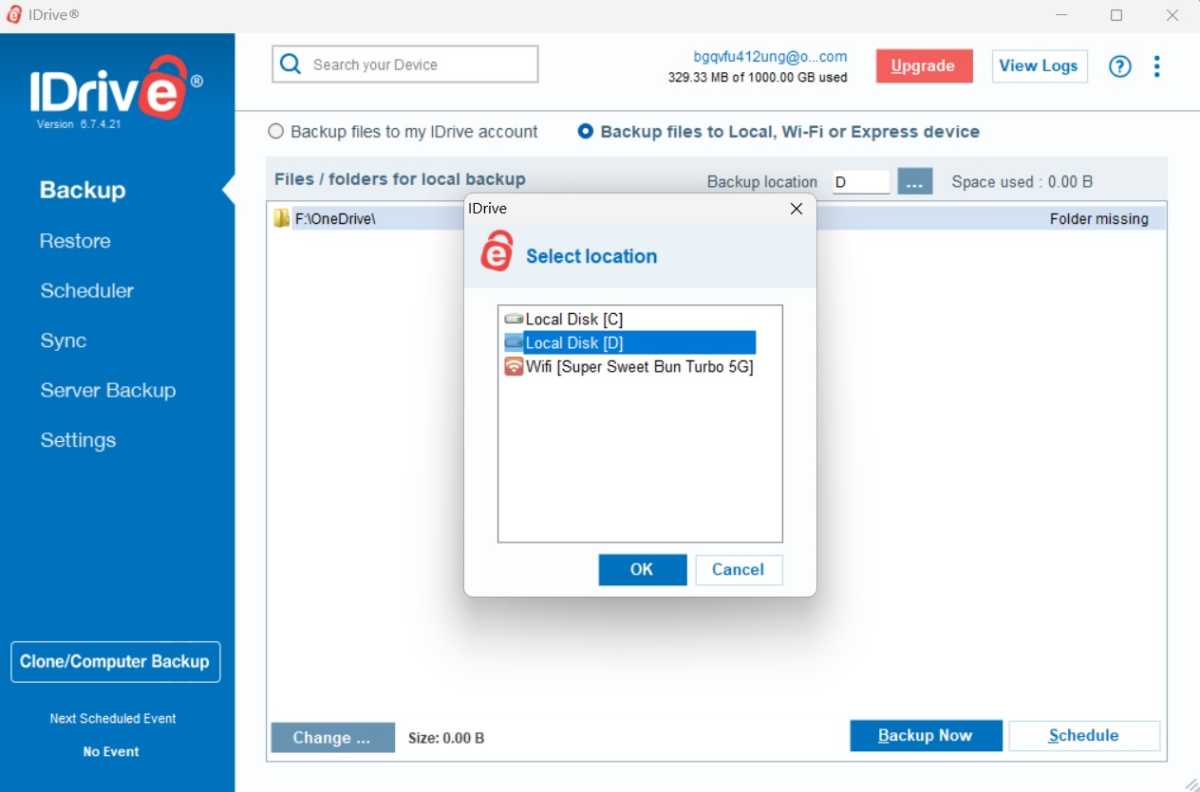
This is important: If you’re restoring data to a different computer than the one that made the backup, you must first head the Backup tab, click “Backup files to Local, Wi-Fi, or Express device,” then select your external drive under “Backup location.” Otherwise, you won’t be able to find your backup data in the steps below.
Jared Newman / Foundry
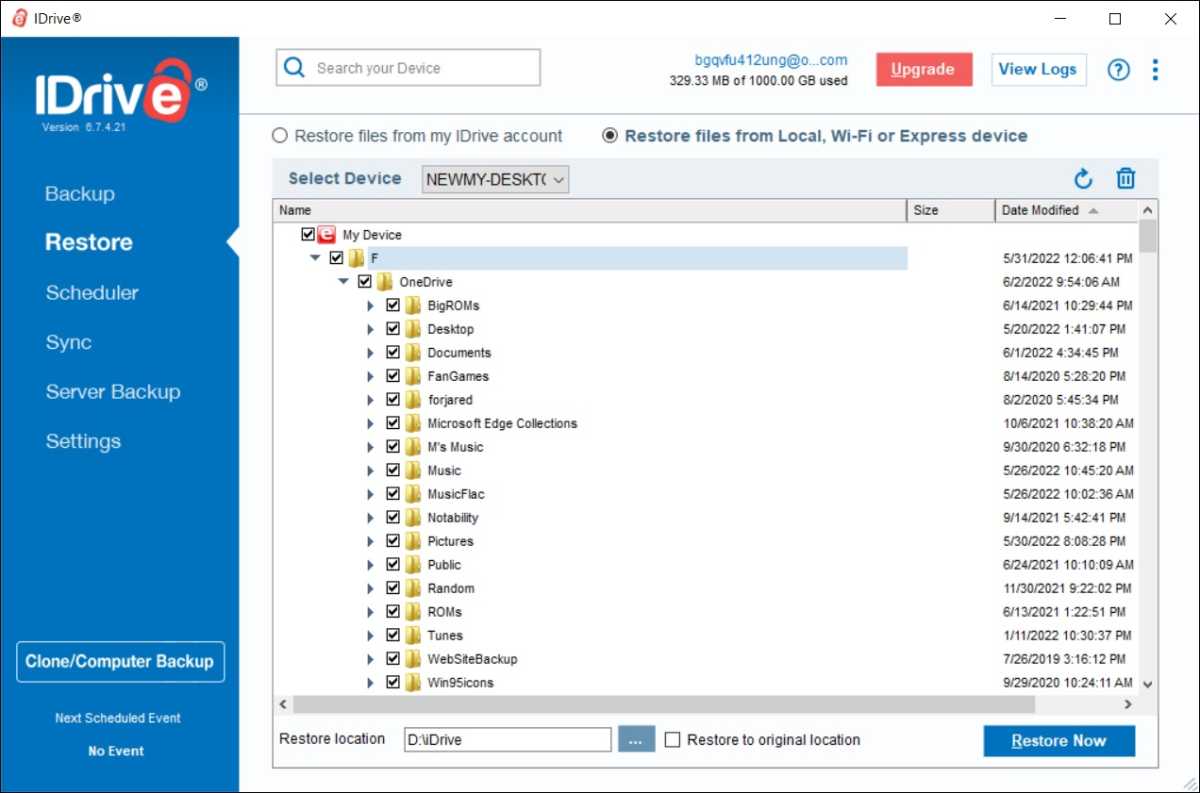
Now, head to the “Restore” tab and select “Restore files from Local, Wi-Fi, or Express device.” If you’re on a new computer, use the “Select Device” box to choose the computer where you originally created the backup.
Check off the files you want to restore, and at the bottom of the app, choose where you want to restore them. You can either select the original location or choose another destination on any drive connected to your computer.
Jared Newman / Foundry
Finally, click “Restore Now” to begin the process. As with the original backup, this can take a while if you’ve stored a lot of data.
Other options
As I mentioned earlier, I personally use OneDrive as my main cloud storage service, and have only been using iDrive for local backups.
But if you aren’t invested in a cloud storage provider already, iDrive’s online service may be worth considering as an additional backup source. The iDrive Photos tier only costs $10 per year (and $1 for the first year), and in addition to backing up unlimited photos from your phone, it can store up to 1 TB of data from your computer. That should be plenty unless you have a huge photo and video library. (The next step up is $80 per year for 5 TB of cloud storage.) iDrive also provides a Sync folder separate from its main backup service, letting you easily access files across all your devices.
Of course, iDrive isn’t the only option for local backups. Companies like EaseUS and Paragon also offer free local backup utilities, and Windows itself has an external drive backup tool built in.
But iDrive’s software is more flexible than the built-in Windows option, and it doesn’t have some of the limits that EaseUS and Paragon place on their free versions. (Both of them, for instance, require a paid upgrade to get status notifications for your backups, and EaseUS even limits backup speeds for free users.) iDrive also offers free disk cloning tools that other companies charge for.
iDrive may be more generous with its local backup tools, perhaps because its business model revolves around selling cloud storage rather than packaged software. Still, you can use it to keep encrypted copies of your data without ever having to pay for it.
If you enjoyed this story, check out my Advisorator newsletter to get more practical tech advice in your inbox every week.

